Knowledge Base
Alerting on multiple targets / best practices.
Question
I'm using PingPlotter Pro to monitor multiple targets. Is there any way to make configuring alerts on each target easier?
Solution
One of the main things we find that many people do with alerts is to create a separate alert for each target being monitored. There is a better way. PingPlotter (and MultiPing) alerts can be reused across multiple targets, so you can configure a single alert and connect it to a bunch of targets, as long as they all have the same alerting needs.
Let's say you want to monitor all your endpoints and get notified when any of them have more than 50% packet loss over the last 10 samples.
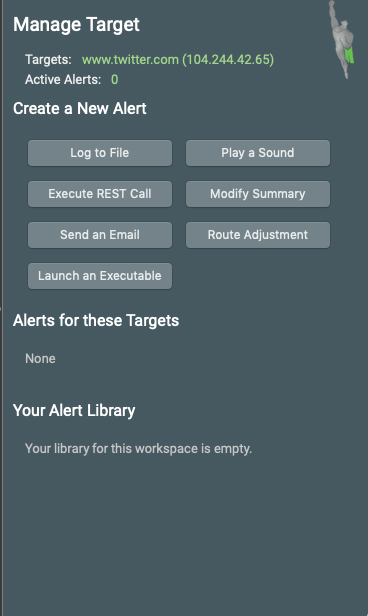
Create a new alert by selecting a trace target and opening the Alerts tab. From the Alerts tab, choose the type of alert you wish to use (for this example, we’re going to send an email). While you’re making this alert for a specific target, you will be able to easily reuse it later.
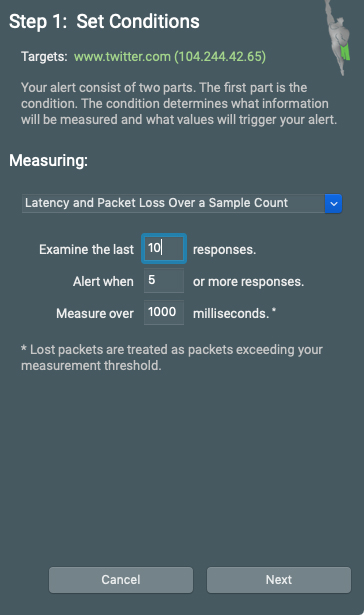
Next, you’ll set the alert conditions you wish to use. For our example, we’re using the following settings:
- Measuring: Latency and Packet Loss Over a Sample Count
- Examining the most recent 10 responses, and alerting if 5 or more exceed 1000ms.
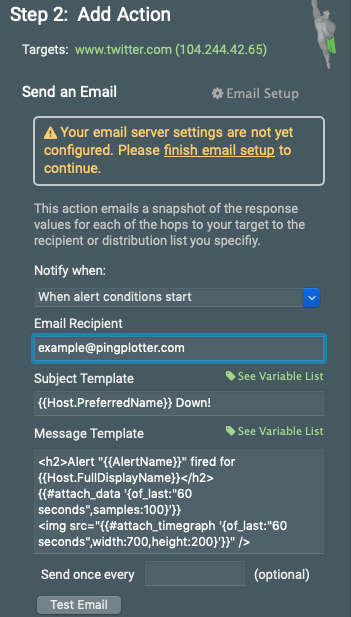
Next, we’ll specify when we want to send our email alert and who to send it to.
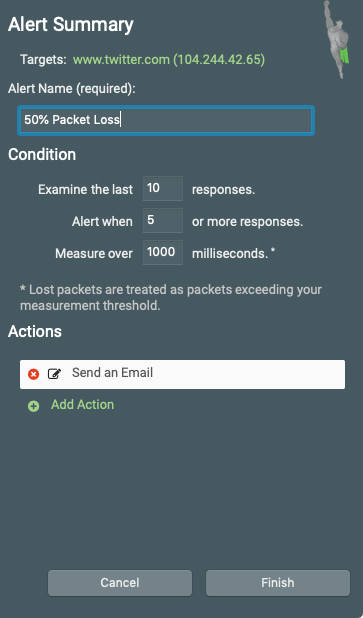
Finally, you can name your alert and add additional actions (such as creating a second email when your chosen condition ends).
Once you’ve finished creating an alert, the Alert tab will now show any alerts active for your selected target. You will also notice your newly-created Alert Library, where your created alerts can be selected for a different target.
Managing your Alert Library
Now that you have an Alert Library, you can apply your alert to any target you choose.
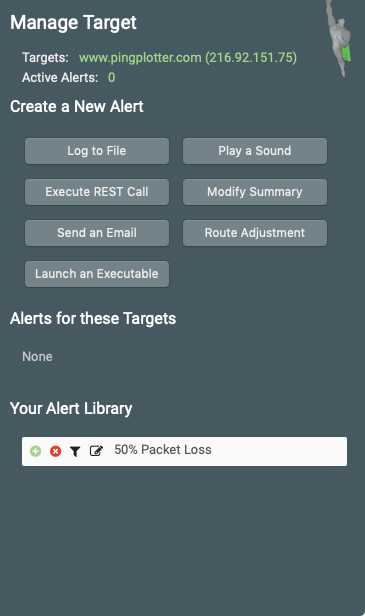
For any target, you can open the Alerts tab and see your existing alerts. Selecting the green button next to the alert name will add it to the selected target. Selecting the red circle of any alert in the Alert Library will delete the alert from your current workspace (which includes any targets using the alert).
Selecting the funnel icon will allow you to apply your alert to a fixed IP range of targets or all targets in your workspace (see below).
The target/hop you just worked with now has [square brackets] around the hop number, which indicates that it is being watched by alerts.
Repeat these steps for each target you'd like this alert to watch. Verify the [brackets]. Do some testing (disconnect the network cable, or similar).
The pen-and-paper icon will allow you to edit the parameters of the selected alert.
Alert best practices
Getting meaningful target names
OK, so now the alerts are working, but maybe your alert subjects aren't displaying quite right. Maybe you're seeing 'asjj3.dne.mynet.com down!' or '13.2.5.9 down!' instead of a meaningful name. You need to change the target name - and there's a couple of techniques for this cover in our knowledge base article on changing a target name.
Optimization (if you're getting too many messages!)
This notification method may notify you too much. If that's the case, rather than adjusting the email frequency in the event, try adjusting the 'Samples to examine' for the alert higher. This will look at a bigger window of packets. If you don't increase the 'Alert when' setting, but you do increase the 'Samples to examine', then the alert will be more persistent before it turns off, which means that you'll get fewer emails.
Another thing you may want to do is a 'progression', where you're notified once if a network fails a bit (say 5 of 10 packets fail), but then you get another email if it continues to fail for a longer period of time (say 150
Other best practices
Only set up alerts on a final destination, unless you're sure that the intermediate router that you're alerting on will never be swapped out of the route. If a router that you're alerting on isn't participating in the route, then you won't get any notifications, even if it was participating in the route at one point. Final destination alerts are always fired, even if they stop responding or the route changes dramatically. Intermediate hops are not.
If you always want to alert an all targets within a submask, try adding a mask by going into the alert configuration, hitting 'Show Targets', and adding a mask there. The easiest mask is 'ALL', which will automatically add this alert to all final destinations you trace to, but you can also do a