Knowledge Base
Specifying which network interface to use.
Question
I have multiple network cards on my computer. Is there any way to target one specific interface using PingPlotter (or maybe different ones when tracing to different targets)?
Solution
Yes! PingPlotter Pro version 5.5.8 introduced support for Network Interface Card selection.
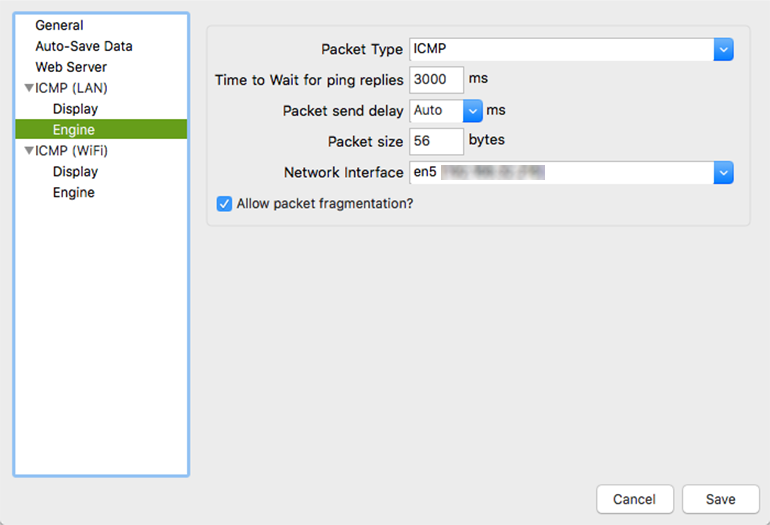
From PingPlotter's Settings menu, select "Engine" for any packet configuration. In this menu is a
You can also create a new configuration with a different selected NIC by right-clicking on an existing configuration and selecting "New."

To specify a NIC while tracing, select the corresponding packet configuration from the "Settings"
Note: The following information currently applies to versions 4.12.0 and older of PingPlotter.
The answer to this is 'kind of'.
Some of our packet types can have the source IP address specified, but there are a number of limitations.
- This works with all IPv4 packet types except for TCP.
- You can specify which network interface to use only, and this is done by the IP Address of the network interface. You can't specify the gateway you want to use - only the network interface.
- The configuration of source interfaces happens by IP address only (not the adapter name).
- The source adapter is specified per named configuration. See our documentation on named configurations for more details.
- This only works on PingPlotter Pro.
- The configuration is a bit clunky.
This capability is implemented using the extensibility system in PingPlotter Pro. To enable this capability, follow these steps:
- Download the script (available at the bottom of this page - in the attachments) and save it in your 'Program Files\PingPlotter\scripts' directory. (Right-click the link and 'Save as').
- Close and restart PingPlotter Pro.
- You'll see a new 'Tools' menu. Under that an option for 'Edit source IP for this configuration'.
- Each named configuration can only have a single source IP. Create a named configuration for each of the network interface cards you want to route data over. Name them something easy to tell them apart. Make sure you pick ICMP Raw Sockets or UDP for the packet type on each configuration.
- Start tracing to a target of your choice.
- In the
dropdown below the target name, pick the right nic (named configuration that you just created). Start the trace. At this point, it's using the configuration, but that configuration is not yet bound to the right NIC. - Bind the configuration to the right NIC. To do that, go to the 'Tools' -> 'Edit source IP for this configuration'. Enter the IP address for the NIC you want to bind to. Note that you are specifying a source adapter for the configuration, not the target, so any other targets that use this same named configuration will use that NIC.
- Now, start another trace and repeat the steps above, but use NIC 2 for the target name and settings / named configuration.
Closing and restarting PingPlotter Pro should keep the settings you made.
It's not entirely intuitive in how this works, so please feel free to ask if you have any questions or issues.
 2.35 KB )